from GDC 2005, by Stephen Ackroyd.
Tuesday, May 30, 2006
Monday, May 15, 2006
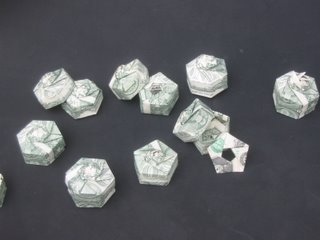
Instructions for $ Hexagonal Box
06/13/07 Update: Please view the video at Metacafe. I will be taking down the LiveDigital upload, soon.
This was kind of a spur of the moment thing. Half of the footage is shot at WCOG; as I was teaching it to Jimmy Taggart, Pam Miike expressed interest in it. I had her film part of the steps to folding the lid. I then went back and had Yuki Kelly film the beginning portion of the lid (the lighting is rather dark). The footage I filmed on my back porch on my own turned out surprisingly well, considering I just rested the camera in front of my chest, and tried to keep my hands in view, but not so close as to be out of focus. Even though my camera is a 2.0 megapixel, the resolution looks rather clean, crisp, and clear. I could probably re-shoot the lid like this...but that would entail more work! Hopefully, this is sufficient.
I realize that I didn't do much in the way of explaining the diagonal crease lines that forms the top of the boxlid, and the bottom. Hopefully, people are bright enough from viewing what I'm doing, that a little brainwork and close observation will carry you through the day. I will have you note, though, that on the lid, where the 1st 7th is unequal to the other 6 segments, when you set in the diagonal crease, it does not touch from opposing corner to corner. Use the last segment to lay over it as a template (with its diagonal creaseline already in place), and then set the crease line that way. If you squint your eyes, you can see me doing this in the video. Good luck, and let me know if you are able to successfully do this, and what level you'd rate yourself. It'd be great if even a novice could follow these directions.
Fold neatly....and for the most part, set your creases in sharp. This will especially help you when you have to hold the two ends together and spiral the top/bottom to lay flat. You might use a clothespin to hold the two ends together while you do this.
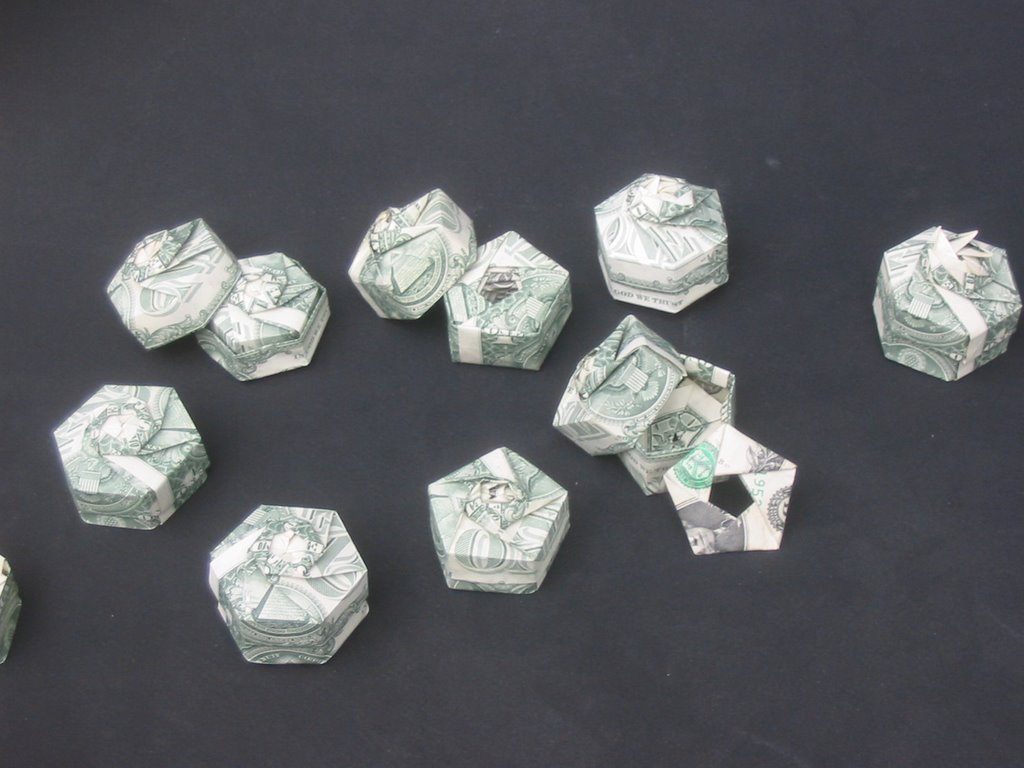
Origami Moneyfold: Hexagonal Box Out Of Money
(Don't forget: There is a "pause" button).
I've been experimenting with different sizes, including making a box within a box within a box. I forgot to include that clip at the end.
Those with foreign currency, noting the method used, or being familiar with Tomoko Fuse-style boxes, can probably figure out how to fold the model, adapted to their bills.
This was kind of a spur of the moment thing. Half of the footage is shot at WCOG; as I was teaching it to Jimmy Taggart, Pam Miike expressed interest in it. I had her film part of the steps to folding the lid. I then went back and had Yuki Kelly film the beginning portion of the lid (the lighting is rather dark). The footage I filmed on my back porch on my own turned out surprisingly well, considering I just rested the camera in front of my chest, and tried to keep my hands in view, but not so close as to be out of focus. Even though my camera is a 2.0 megapixel, the resolution looks rather clean, crisp, and clear. I could probably re-shoot the lid like this...but that would entail more work! Hopefully, this is sufficient.
I realize that I didn't do much in the way of explaining the diagonal crease lines that forms the top of the boxlid, and the bottom. Hopefully, people are bright enough from viewing what I'm doing, that a little brainwork and close observation will carry you through the day. I will have you note, though, that on the lid, where the 1st 7th is unequal to the other 6 segments, when you set in the diagonal crease, it does not touch from opposing corner to corner. Use the last segment to lay over it as a template (with its diagonal creaseline already in place), and then set the crease line that way. If you squint your eyes, you can see me doing this in the video. Good luck, and let me know if you are able to successfully do this, and what level you'd rate yourself. It'd be great if even a novice could follow these directions.
Fold neatly....and for the most part, set your creases in sharp. This will especially help you when you have to hold the two ends together and spiral the top/bottom to lay flat. You might use a clothespin to hold the two ends together while you do this.
Origami Moneyfold: Hexagonal Box Out Of Money
(Don't forget: There is a "pause" button).
I've been experimenting with different sizes, including making a box within a box within a box. I forgot to include that clip at the end.
Those with foreign currency, noting the method used, or being familiar with Tomoko Fuse-style boxes, can probably figure out how to fold the model, adapted to their bills.
Friday, May 05, 2006
Wednesday, May 03, 2006
Westland Origami Workshops
Nina Rosen invited me for what I think is my 3rd year out of 5, doing origami at Westland School, off of Mulholland, here in Los Angeles. It all started with one of the parents at Santa Monica Gymnastics Center seeing my origami Christmas tree display in the office; something that I put up every year. She put me in contact with Nina Rosen, who was her son's teacher at the time.
This year, Nina set up something different: instead of one demonstration/teaching session, we set up four 2 hour workshops. So what I tried to do, was build a progressive lesson plan.
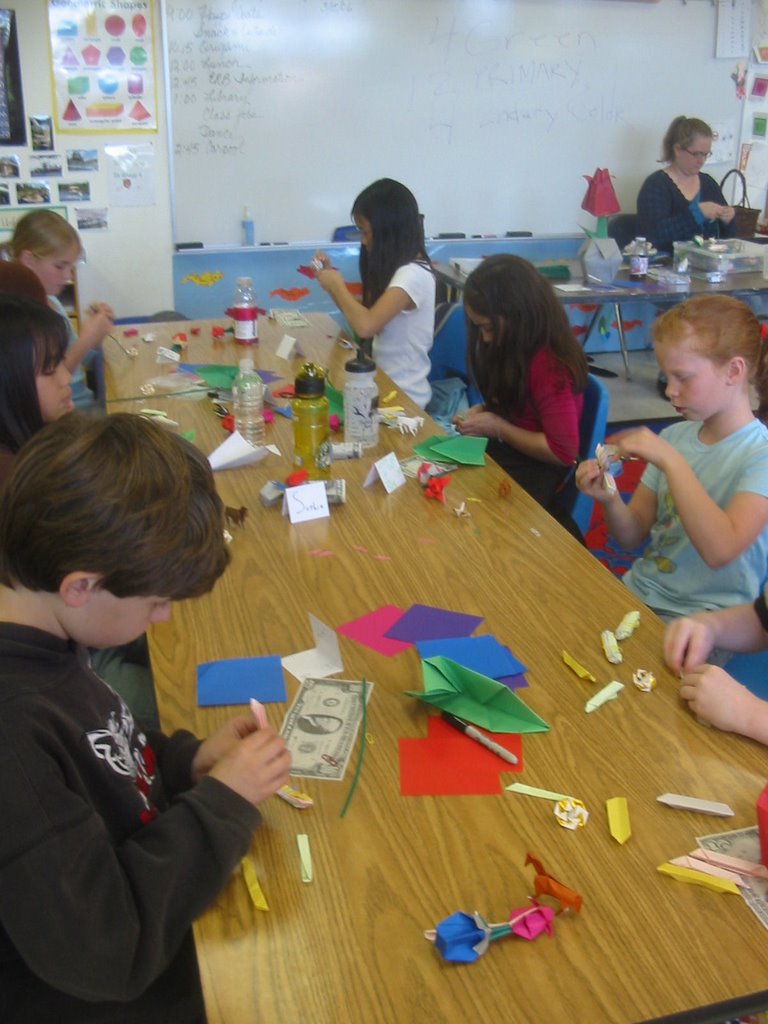
These workshops were conducted back in February and March. I began with your typical introduction, showing off traditional models and the evolution into modern origami. In each workshop, I brought something new to show off. I began with teaching Yami's banger, which transitions nicely into a moving mouth. Fairly simple. I also taught Yami's spinner that day. The kids seemed very excited after that first day.
The second workshop, we did a simple swan from a kite base, and covered the reverse fold (required for the head and neck). I encouraged the students to experiment with proportions and go off onto tangents to come up with their own swan/bird by incorporating reverse-folds. Charles Esseltine granted me permission to distribute diagram copies of his delicious french fries. I can't think of a better model to teach that has the simplicity of the traditional papercup, with the joy and ease of shaping the bottom by denting it with your finger; and what beginner can't like fan-folding the fries into 16ths, without having to be perfect at it, and still end up with a great-looking
 origami model? We covered the waterbomb base, and incorporated it onto index cards for the jumping frogs. I then brought back the previous workshop model, the moving mouth, setting up a big version of it as the target for jumping frogs to hop into the mouth of.
The third workshop, I opened with a demonstration of Kenneth Kawamura's Butterfly Ball (using printed paper created by Lar deSouza). It was a way to revisit the waterbomb base from the previous lesson. We made waterbombs. I think we also did cranes, as I showed how the waterbomb base can be turned inside out, into the preliminary base.
There had been a request for folding paper planes, as I think the first day, I had demonstrated the boomerang cicada glider I like to do. So we did that toward the end, and had a blast flying them around outside on the playground. It was a bit windy, so the breeze sometimes picked the gliders up for a long flight. The kids loved launching them from up high, on the slide.
The last workshop, I taught the Thai tulip, which starts with the waterbomb base I had been hammering into their heads. We also did the 20-piece modular flower. That kept 'em busy.
At the end of each workshop, I had giveaway models for them, including stuff Joe Hamamoto had made, and three of my favorites: the LaFosse butterfly, Arai spinning top, and 22 Montroll horses- my all-time favorite- for 22 wonderful kids, who I hoped I had inspired to continue exploring the magic and fun of folding with paper.

For more pictures, go here.

05/22/2007- It would seem that there are some parents who are angry about the YouTube video. Therefore, the video is now on a private setting, as well as the Westland photo album. I will only make these accessible to family and friends. Sorry.
Subscribe to:
Posts (Atom)